RenderTargetBitmap in action

I recently talked about some techniques to use RenderTargetBitmap to generate images for your live tiles. Today, we’ll look at some code that goes along with that.

1
2
3
4
5
6
7
8
9
10
11
12
13
14
15
public static async Task SaveTileImage(UIElement control)
{
var element = (Border)XamlReader.Load("<Border xmlns='http://schemas.microsoft.com/winfx/2006/xaml/presentation' xmlns:x='http://schemas.microsoft.com/winfx/2006/xaml'/>");
element.Child = control;

var bitmap = new RenderTargetBitmap();
await bitmap.RenderAsync(element);

var renderSize = new Size(bitmap.PixelWidth, bitmap.PixelHeight);
var pixelBuffer = await bitmap.GetPixelsAsync();
var encodedBuffer = await EncodeBuffer(pixelBuffer.ToArray(), renderSize);

await SavePixelsToFile(encodedBuffer, Tile_Wide_100_Name, Tile_Wide_100_Size);
await SavePixelsToFile(encodedBuffer, Tile_Wide_400_Name, Tile_Wide_400_Size);
}

This is the only public facing method, and it has a pretty simple signature. We provide a user control, and it will generate and save all Live Tile images. The names Tile_Wide_100_Name and Tile_Wide_400_Name are public constants that are used both by the Image Generator class and the Tile updater class.
Tile_Wide_100_Size and Tile_Wide_400_Size are constants I define in my projects to hold the required sizes for live tile images according to specs.

To manipulate our rendered bitmap we must first process the raw pixels by using an encoder. The result is an RandomAccessStream that we can use to apply transformations and save to file.

1
2
3
4
5
6
7
8
9
10
private static async Task<IRandomAccessStream> EncodeBuffer(byte[] pixels, uint width, uint height)
{
var result = new InMemoryRandomAccessStream();

var encoder = await BitmapEncoder.CreateAsync(BitmapEncoder.JpegEncoderId, result);
encoder.SetPixelData(BitmapPixelFormat.Bgra8, BitmapAlphaMode.Premultiplied, width, height, 96, 96, pixels);
await encoder.FlushAsync();

return result;
}

Lastly, once we have our stream we can start thinking of manipulation and saving to files.
The interesting part is in actually performing the resize and optionally crop for a square tile. We will be using the BitmapTransfrm class for that. The class allows us to apply 4 types of transformations to our image: Scale, Flip, Rotate, Crop. This is also the order in which the transformations are applied and that is important because we need to know what parameters to pass in.

Let’s look at an example and see how this works.
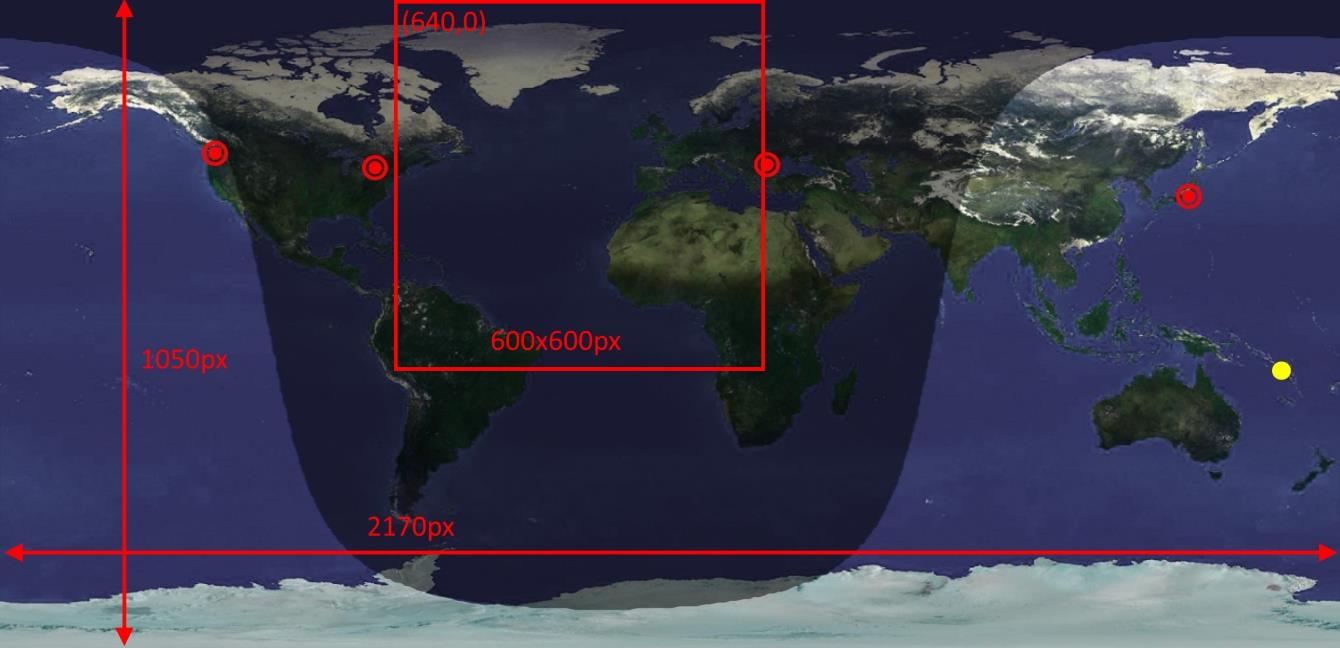
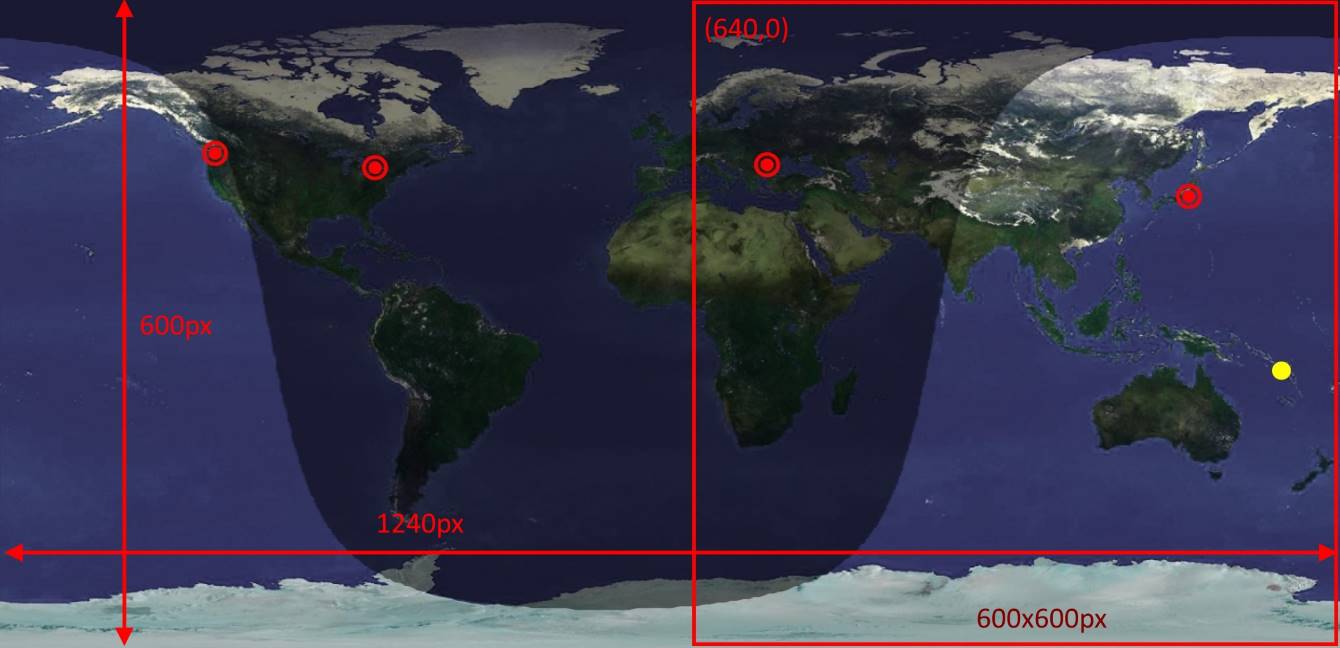
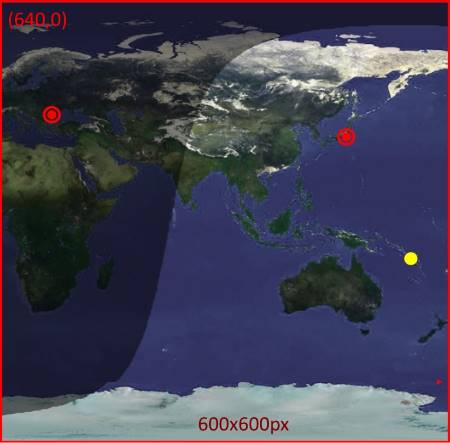
I want to render a 1240x600px image for my 400% wide tile. My DPI is at 175% so the rendered image will be 2170x1050px. To make matters complicated, the square tile (600x600px) is a portion of the bigger wide tile - the right side of it.

If we don’t scale first, and only apply the crop, we only get a small chunk of our image:

So by applying the scaling first, then the crop, we get our desired results

Now that it’s clear how the transform works, here’s the full method that applies it to our encoded buffer and saves our images to disk.

1
2
3
4
5
6
7
8
9
10
11
12
13
14
15
16
17
18
19
20
21
22
23
24
25
26
27
28
29
30
31
32
33
34
35
36
37
38
39
40
private static async Task SavePixelsToFile(IRandomAccessStream pixels, string fileName, Size scaleSize, Rect cropBox)
{
var finalW = (uint)scaleSize.Width;
var finalH = (uint)scaleSize.Height;

pixels.Seek(0);
var decoder = await BitmapDecoder.CreateAsync(BitmapDecoder.JpegDecoderId, pixels);

//Configure scale transform
var transform = new BitmapTransform()
{
ScaledWidth = (uint)scaleSize.Width,
ScaledHeight = (uint)scaleSize.Height,
};

//Configure cropping transform, if required.
if (cropBox != Rect.Empty)
{
finalW = (uint)cropBox.Width;
finalH = (uint)cropBox.Height;
transform.Bounds = new BitmapBounds { X = (uint)cropBox.X, Y = (uint)cropBox.Y, Width = finalW, Height = finalH };
}

//Get pixels from decoder, and apply transform in the process
var pixelData = await decoder.GetPixelDataAsync(
BitmapPixelFormat.Bgra8,
BitmapAlphaMode.Premultiplied,
transform,
ExifOrientationMode.RespectExifOrientation,
ColorManagementMode.DoNotColorManage);

//Encode pixel data and save to file.
var file = await ApplicationData.Current.LocalFolder.CreateFileAsync(fileName, CreationCollisionOption.ReplaceExisting);
using (var fileStream = await file.OpenAsync(FileAccessMode.ReadWrite))
{
var encoder = await BitmapEncoder.CreateAsync(BitmapEncoder.JpegEncoderId, fileStream);
encoder.SetPixelData(BitmapPixelFormat.Bgra8, BitmapAlphaMode.Premultiplied, finalW, finalH, 96, 96, pixelData.DetachPixelData());
await encoder.FlushAsync();
}
}

Testing shows that to render one image and save 4 versions of it takes approximately 2s when running on a phone, well below the CPU time threshold.

Leave me a comment or drop me a line if you need any help with this or something similar.

Share Comments