I’ve been working with the HoloLens for about 6 weeks now (yes, I’ve been one of the lucky Wave 1-Day 1 HoloLensers) and even though I haven’t written anything yet, there’s a lot of stuff I learned about it and I will try to start and put in on “paper” in the following weeks.
Performance Performance Performance
One of the key things in delivering a truly amazing HoloLens experience is performance. Top priority from start to end of the project is to have the application running at 60fps ()
I am not going to write here about the techniques on how to achieve that - you can find all about it on the excellent HoloLens documentation site here and here, but I will present some pointers on how to measure that framerate as easily as possible.
Monitoring Framerate
The most obvious and simple way is to simply monitor the framerate from the built in portal. In the “System Performance” tab there is a Framerate chart that shows the current framerate and the history.
The disadvantage of this approach is that you need to position the holograms in such a way that you can see the computer screen at the same time as you see the scene and it can be a bit difficult.
A more convenient solution would be to have the FPS display right in your application as a head-locked UI element that you can enable during development when you need it. Luckily, the HoloToolkit comes with an awesome script called ‘FpsDisplay’ that does just that - writes the current framerate on a UIText element that you need to provide.
Unfortunately, the HoloToolkit does not come with a prefab that you can just drop in your scene so we’ll build it ourselves.
To use the script, we need a UIText component which in turn requires a Canvas in the scene. The default UIText color is black (and it’s tricky to change it due to a bug) so it would be nice to have a white background to show the text on. We can use a UIImage for that, which by default will be all white and we’ll nest the Text inside the Image. Here are some basic steps to create the hierarchy we need.
- Create a UIText component and name it ‘FpsText’
- That will create a Canvas and an EventSystem in the scene as well. Since we don’t need any interactions, we can delete the EventSystem.
- Create a UI Image component and set the ‘FpsText’ as a child of the Image.
- Create an empty game object as the parent ‘FpsDisplay’ and set the Canvas as children of this object
- Attach the ‘FPSDisplay’ script to the ‘FpsDisplay’ game object we created, and set the ‘FpsText’ as the ‘Text’ property.
- Configure the Canvas
- Configure the Image and Text
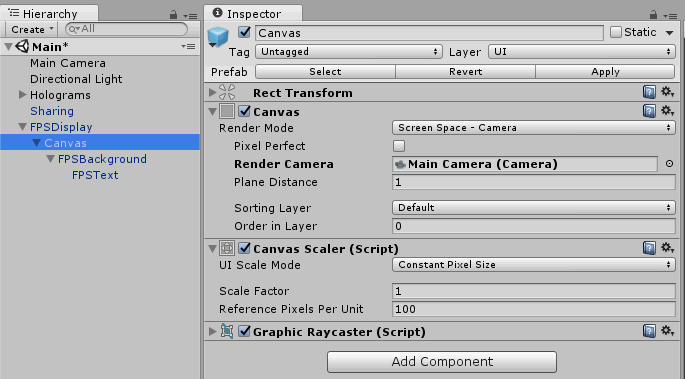 Inspector View
…or just use the prefab attached at the end of the post.
Canvas configuration
I found that the easiest way to get my Image in view is to use the “Screen Space - Camera” render mode on the Canvas. This option has a dependency on the Main Camera, so that’s an additional parameter, but that yields the easiest configuration for the rest of the components.
Secondly, you might want to play with the “Plane Distance” parameter. The default value of 100 will render you FPS display very far away and behind all Holograms. I chose a value of 1 but you can play with any values that might work for you.
Image and Text configuration
For the Text display I think the top right corner would be a good place so we’ll anchor the Image to the top right and the Text to the center (since it’s inside the Image). Give the text an offset of 5 and -5 to act as margin.
For the image, the offset is a bit more interesting. With my original offset of 0, I noticed that the text was very blurry and fuzzy. I soon discovered that it was only showing on one eye (the right one). So I had to adjust the offset to a larger -400 value to ensure that the component will be rendered by both lenses and visible on both eyes to.
Final
You can find the prefab here and you can just import it in your project. The only prerequisite is that you have the HoloToolkit added in your projects directly under Assets.
Once you drop the prefab instance in your scene, remember to attach your Main Camera to the Canvas - Render Camera